Showing posts with label Challenges. Show all posts

February 16, 2014

February Challenge-Contour Drawing


“To see we must forget the name of the thing we are looking at.” 

                                                                                                      Claude Monet


 February Challenge:  Contour Drawing   by: Cynthia (Cindy) Powell ©2014

 Whether you work with positive or negative shapes, the size and shape of the subject being painted, is established at its edges, by the application of a line or the absence of one.  (Lost & Found)

“The quality of line is more important to the painting than mathematical precision” (Grant Fuller)

I’m not sure I agree with that statement but it certainly qualifies for “food for thought”.  What do you think?  Is perspective more important than shape or size?  Can a painting be a painting without one or the other?  Would it be considered an “Abstract” if it had no perspective? 

Why explore the concept of line drawing?  Art is line and without line we have no shape to objects, no vision-or comprehension of what we are seeing, no movement.  Lines are just one of the key elements to design and line defines the shape of all objects.  These lines can be thick or thin, visible or partially removed.  (Our brain fills in the blanks.)  Lines can also define the curve of an object or the 3-D plane along with light & shadows, which can also be defined by lines.  The lightness or darkness of a drawn line can determine where the shadows are on a subject.  These lines are called: “Cross contour lines”.  These cross contour lines create the depth of vision or depth of field in a painting.  They can be free form or be created using a straightedge depending on the object being sketched.  They can be quickly drawn or detailed with perfect accuracy, but it all takes practice.   
(Photo courtesy of Annie Wu)

The image I used, with permission from Annie, http://www.flickr.com/photos/anniew/  clearly shows depth of a person standing in a circle which could be a pool of water or simply a background to give added dimension.  Without these cross contour lines, we would have a very flat 2-dimensional outline only, which is what we usual use when painting images like landscapes.  What about urban landscapes?  Or flowers?  Would this technique of cross contour lines be beneficial?  Topography (map making) utilizes this method of drawing, but would it be useful as a tool in your art?  If so, then you may find these links useful:  They are links to tutorials for contour, blind contour and cross contour drawing.


A few other contour images to explore:
 
Blue stripped shells: (In Nature)


Wavy Lines:


 and: If you google: “contour drawing images”, you will discover a wealth of images to inspire your practice.  Grab your art journal and have fun!

 This image is from my art journal and the drawing is of glazed ceramic bottles that I used as a practice reference because I loved their shapes.  I first drew the shapes (outline only) in pencil, then painted the contour lines (+shapes) and finally, erased any pencil lines. 

To get crisp edges, you can use a piece of paper or other mask, like tape, then paint the lines and remove the mask.

January 14, 2014

Just A Reminder

This is just a friendly reminder about Ian Ramsay's demo Thursday night, Jan. 16th at 6:30  at the Sandy Senior Center. He is one of our favorite artists and you won't want to miss him.
You know our regular meetings are held the 3rd Thursday of each month (except for July and December for summer & winter breaks).  These meetings are free and open to the public. So if you have a friend who might be interested in art/watercolor painting, please invite them to join us.
*Reminder:  The annual membership fees of $15 are due...so please bring your check (made out to SSCAC....that's Sandy Senior Center Advisory Council if you want to write it out.)
We also need you to check the accuracy of your info. and update any changes to your email, phone numbers, address, etc. so that we can contact you. We only use your info for club business and never share it with anyone.
* Our next workshop is Virginia Kimball's, "Come Celebrate Chinese New Year" on Feb. 13th from  10:00am to 4:00pm at Virginia's home in Sandy. The fee is $35 for members and $40 for non-members. This workshop will include a Chinese Buffet Lunch.  Virginia is hosting this workshop at her home and she will have the address available with other information at the Thursday meeting.  Please reserve your seat/place by signing up and paying for this fun and exciting workshop at our Thursday night meeting.
The monies we collect from fees and workshops helps to support our club activities, and allows us to offer more guest artists and have a wider variety of workshops/demos.  These fees also allow us to host an annual Christmas Party for all of our members. 
* Maggie Harrison is chair of our annual "Spring Show 2014",  a non-juried watercolor exhibit of members & non-members art.  (See blog post below for updates and show rules).  Maggie is going to need help for this event, so please sign up to help her with this huge endeavor.  All help will be greatly appreciated. 
See you Thursday night!
Suzan

PS-If you have completed the January "Challenge" Art-Using a Palette Knife-(See post below), please bring your artwork to the meeting for Show N' Tell.  This photo is of a "3rd attempt" at this challenge using a different image.  I'm enjoying the process so I will keep playing around with it for awhile longer but I have another challenge (February) that will be posted soon! "Contour Drawing"   It's all for fun so if you don't have time to participate, that's Okay-you may be able to in the future.  Cindy

December 20, 2013

Are You Ready for a Challenge?

I've asked several of the members of the Guild if they would be interested in participating in monthly painting challenges and the response was very encouraging, so I created a painting challenge for January 2014.  If you have time, please join us for some fun monthly challenges.  I will try to make them as diverse as possible, so that everyone can play along.  Please bring your results to our January meeting on the 16th for a quick Show N' Tell.  Remember, Ian Ramsey will be our guest speaker!


Painting with a Palette Knife Experiment by: Cindy Powell

Notice I said experiment in the title of this challenge-the results I managed to accomplish were random and unpredictable.  I think that is why I love this technique so much.  No two paintings would be the same.  Each painting will be unique to the individual artist, so please, if you have time, take a few minutes to do this experiment and bring your results to our Jan. meeting for Show N’ Tell on January 16th. 
I have provided a pencil drawing for those who would simply like to trace the “Hose bib” as I have drawn it, using graphite paper or you can use it as a reference for your own drawing or you can go to this website: SplashingPaint to download the original image.  Notice this is the link to the download page, so check out the other free tutorials offered.  (We may use this site again in the future as there are a few good free tutorials here).  The tutorial given is for the use of a limited palette, my version is using the image provided, but with a different set of instructions that I found in a wonderful book titled: “Watercolor Wisdom” by Jo Taylor AWS from our local Sandy Library.  (Book Review Coming Soon!)

First draw the image on your watercolor paper-and this doesn’t have to be perfect-a quick sketch will do just fine!  Make some changes if you like or use another image of your choice.  Right click the image below for a full sized image to download or print.


Select your color palette:  I was using a cheap Master’s Touch Travel Palette so I have no idea what colors I was actually using.  Blue, Red, Purple was what I had available.  Wet your pigment with a spray bottle of water, or whatever method you use to wet your pigments and using a palette knife, pick up some pigment on the tip of the knife and apply it to your image.  Your paper should be dry at this point.  (You may want to EXPERIMENT with how wet you want your pigment at this stage.  Very dry pigment seems to cause more problems and is harder to work with.) (You may also want to dampen your paper with a sponge-the choices are all yours!)

Once your pigments are where you want them, load a 1” flat brush with clean water and start to apply really wet washes everywhere you applied the pigment.  Tilt your paper and let the water & pigments run.  Let it dry to see if you need to repeat the steps. 

Personally, I was not happy with my results so I applied more pigment to darken the blues and purples. 


When I repeated the step to apply the pigment, I used very wet pigment with a very wet brush and simply let it run.  Very loose and very free flowing.  This is the end result of my experiment and I look forward to seeing your experiment at Show N’ Tell.  Have Fun!  :-D Cindy


December 3, 2013

Welcome

We are in the process of setting up this blog so that the members of the Sandy Watercolor Guild will have a place to share their paintings, tips, ideas, etc. with the general public and each other.  If you live in the Sandy, Utah area, we would like to extend an invitation to you, to join us every 3rd Thursday of the month at the Sandy Senior Center, from 6:30-8:30 for our regular monthly meetings.
As the members of the Sandy Watercolor Guild become more familiar with how this blog works, we will be posting more frequently, so you may want to sign up to follow this blog, via your e-mail.  The link is in the right sidebar.  (Simply type in your e-mail address and click the button. You will be sent an e-mail each time a post is made to this blog).
The list of topics that has been generated in the right sidebar is just a set up action at this time.  There are no posts available for these subjects yet.  With time we hope to bring you a wide variety of topics related to watercolor painting and other water media.   We will be adding additional pages, just like on a real website. These additional pages will be listed in the sidebar soon and will have a heading related to what is posted on that page. ( i.e. a demonstration of a painting being created, a video feed or a tutorial for a particular technique).
Each member will be given the opportunity to be added as an author to this blog and will have access to post their own images and write their own articles for the group to read.  Posting of upcoming events, information about workshops, etc. is fine.
A few words of caution when using this blog:   Please do not post any personal information to this site, as it is seen by the general "world" public.  Do not post that you are leaving for a vacation, or that you have a new phone number.  Keep that information private and share with your friends, face to face.  If you do not want your photos to be used by others, resizing them to a 500 pixel x 500 pixel format at a 96 resolution will allow for better viewing without adding a watermark.  Visitors can click on the image posted for a larger version, but without all the high resolution for printing purposes.  You may add a watermark if you desire, at least sign your work before posting a photo of it, so that we all know it is yours.  As you load your images to this blog, blogger will give you options for size and placement.  I won't go into that right now, but will be adding a video for members only to view on my youtube channel that will show you step by step how to add images and post new information.  It's relatively easy to do.
When we are up and posting begins, please leave us a brief statement about what you are posting.
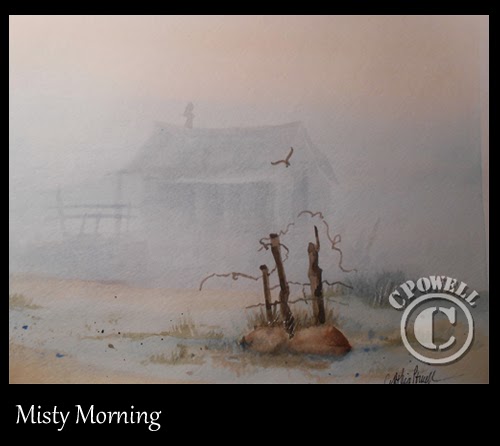
The painting I shared here was done in my daily painting journal and my goal was to paint an image surrounded by fog.  I was following step by step instructions provided in "Keys to Painting Color & Value" by: Rachel Rubin Wolf, a book I picked up at the local library.